How To Cut Heat Transfer Vinyl With Silhouette Cameo: Expert Guide
A silhouette cameo is a cutting tool that comes as a computer accessory and is simply plugged in using a USB connection. The machine has got similar properties to a die cut machine, only this time the cutting process is automated.
Using this cutting tool and the software that comes with it, you are able to create various designs on your computer screen and cut these designs onto a selection of materials.
These include various types of paper, fabric vinyl, or heat transfer material. Your creativity only limits the kinds of designs.
One of the common materials that are used on this machine is Heat Transfer Vinyl. This is a unique kind of vinyl material that has properties that make it a convenient choice to design, cut and use to decorate fabrics.
It is very common with fabrics used for all sorts of functions like t-shirts, table mats, etc. The process is quite simple but elaborate, and you need to understand the material and machine you are working with to get the best results.
Read Also: Top 10 List Of Best Heat Transfer Vinyl For Silhouette Cameo
Table of Contents
Materials That We Need To Cut Heat Transfer Vinyl

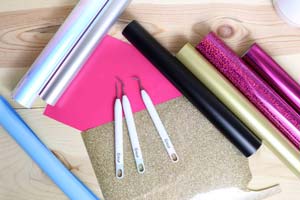
First of all, it is not just the material and cutter that is required in this process. So, to ensure you don’t have any hitches make sure you have everything before you start:
Once your tools and materials are in place the process can begin.
How To Cut Heat Transfer Vinyl With Silhouette Cameo: Step By Step Guide
Instruction Manual
Go through the Silhouette Cameo instruction manual. It is available on the software itself, online or for original purchases in a booklet that comes with it.
Despite this guide which cannot give detailed specifics to all the machine functions, it is important to understand the manufacturer’s instructions.
Design
You can create your own design on the software or access the cloud component and choose from a variety as big as 100,000. It is advisable that you make a very simple design for the first time. The machine is however not limited to simple designs.
Loading
Load your design onto silhouette studio and mirror it which means it faces the wrong side. Take note that at the end of this, it is going to be pressed the right side up.
After this, press the send button at the top right end of your screen. You need to remember that the machine and software cut according to preset instructions.
So, you need to select that kind of material from the list. Like, in this case, the option for the Heat transfer vinyl is ‘heat transfer smooth.’
Placement
Place your HTV on a cutting mat with the shiny side facing down and adhesive side facing up.
Loading
Load the cutting mat containing the vinyl with your design into the Cameo Silhouette cutting tool.
Then click send at the bottom of your screen to initiate the cutting process and wait as the machine slowly executes your command. After the cutting process is complete, carefully remove cutting mat.
Make sure the blade setting is at 1 which is the pre-determined setting for lighter materials such as HTV and other materials of the same gauge.
Weeding
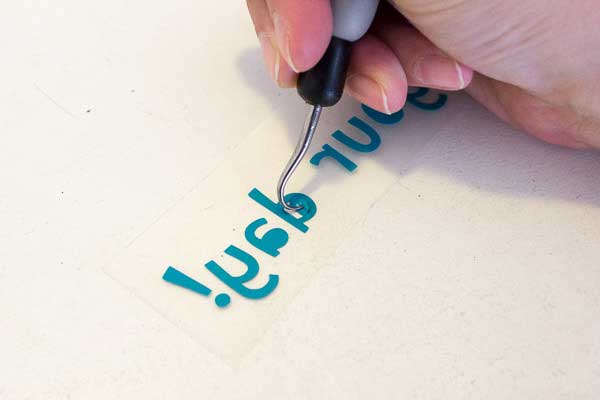
This refers to removing the excess material from the cutting just like people throw away paper residue after cutting out patterns.
However, in this case, you will need a small hook-like object with a smooth edge that will not damage your vinyl as you remove it. After weeding what you will be left with is your design facing upside down on the cutting mat.
Now, you have your design clearly cut out and the next step will be to ensure that the material to be decorated is also ready. A poorly prepared surface will cause one fault or another during or after you are done with the process.
So, if you are working on a t-shirt you need to make sure:
And, now you have your design. It may seem like a very tiring process, but in a real sense, the application of these instructions is much simpler than it appears on paper.
It’s the attention to detail that is important as a mess in one stage could ruin the whole process.
Frequently Asked Questions (FAQs)
1. What blade setting on silhouette for heat transfer?
There are different settings for cutting different thickness of the material. In short, there are ten settings that range from 1 to 10. Blade setting one is used cut thin vinyl and other smooth material. Two to three is for medium-weight material like paper, flocked heat transfer and cardstock. Settings four to six used to cut thicker material like pattern papers and textured cardstock. Last of the settings are 7 to 10 which are used for cutting thick canvas.
2. Do you cut HTV shiny side up or down?
If you don’t want to mirror your text, you can send the original text from the screen of your design for printing. If you do, don’t remove the original text. Move the mirror text back and forth to position it correctly. Cut it backward if you don’t want to mirror your text.
3. Can I print on silhouette vinyl?
There are some printable vinyl’s that you can use for Silhouette print and cut. Sublimation is costly, and layering vinyl isn’t always ideal. The inkjet printable vinyl is such bliss when it comes to printing. Print the vinyl with the laminate on top and keep the Silhouette settings on speed 8, Blade 6 double cut and thickness 16.
4. What materials can be cut with a silhouette cameo?
The silhouette cameo is designed to cut a wide variety of materials including cardstock, paper, vellum, vinyl, patterned papers, fabric, iron-on heat transfer and many more. Different blade settings accommodate for different material cut and thickness.
For example, the standard blade can extend to approximately 1mm in depth. Depending on thickness, you can cut selected fabric. Felt materials can also be used to cut. The deep cut blade setting can cut fun foam and wax paper.
Final Words
Silhouette Design Studio is powerful software, and at the right settings and design, you can make some creative patterns. It gives you more freedom to create the shape you want as long as the material you want to cut can be done so with 210g of force.
Take a picture with your camera and send it to the Cameo 3. This is possible thanks to the PixScan technology. The dual cartridges give you the ability to swap out the empty one without turning off the power.
The software is easy to use, and the basic version is free. If you want to make some awesome designs by cutting heat transfer vinyl with silhouette cameo, go ahead. It’s worth the investment. The cameo 3 which is the newest can cut most vinyl, paper, and standard fabric just fine.
Thanks for reading our blog. Happy Crafting!

