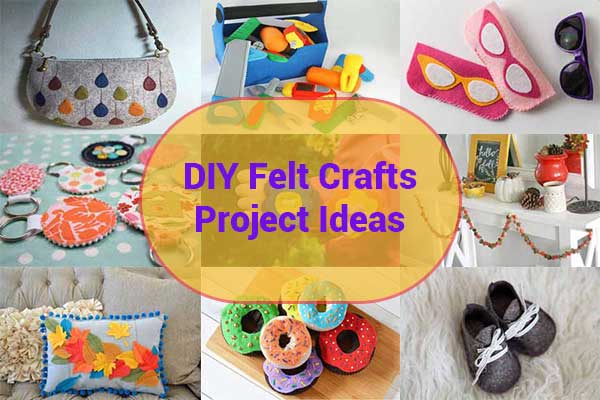
Felt Crafts Ideas: Top 25 DIY Project And How To Do Them
A crafter is born with a creative mind that needs to be constantly fed with new inspiration to retain its spark.
And the good news is that you will never get bored as there are hundreds of thousands of crafting materials to try your hands on!
Among these materials, “felt” is perhaps the most versatile fabric available on the world of arts and crafts. It can literally transform into anything you want!
Feeling a bit cold? A felt scarf will come to the rescue!
Need footwear? Felt shoes are probably the most comfortable and cozy ones out there!
From making children’s toys to giving your pillowcase a new makeover, felt is incredibly adaptable and can be cut to any shape or thickness you want without a trace of grain in sight.
Wait. What?
No grainline to watch out for while cutting pattern pieces from this material?
Yep! And there are many more surprises waiting for you once you get to know our top 25 felt crafts ideas and how to do them guidelines in this article!
Let’s get you started right away!
Table of Contents
What is Felt And How It Can Be Used?
Felt is a man-made non-woven textile. It’s created by intertwining and matting the fibers of wool or acrylic materials until they form a sturdy structure.
Often times, you need to apply heat, moisture and a lot of pressure to attain the desired outcome.
But hey!
The end result is worth all the hard work as felt is known to be one of the softest and highest quality fabrics on earth.
Remember when we told you that this fabric has a magical property that doesn't let it fray or have any grain whatsoever?
Well, this uniqueness makes this material a great candidate for no-sew craft projects.
Apart from that, felt is extremely popular for its sheer versatility. Anything that comes to your mind can probably be made with this fabric!
Let’s take a look at some of the examples of what this material is capable of making:
Winter Material
Have the cold winter days hit earlier than expected this season?
Well, the good news is, felt has got your back!
The unique texture and quality of this fabric makes it ideal for making all kinds of winter wear. From hand-knitted mittens to scarves and hats, this fabric is the ultimate champ in making all kinds of winter accessories.
Kid’s Toys
Kids love things that are fluffy, soft and squishy.
And felt has got all of the qualities above!
You can easily make stuffed toy letters, rainbow puzzle, weatherboard, toy trucks, pencil toppers, butterflies and even build an entire mechanical toolset out of felt fabric!
House Décor
Did you know felt is one of the most budget-friendly materials out there?
So, the next time you intend to purchase an expensive home décor, think again!
Whether you want to put up a gorgeous wreath on the front door or decorate the curtain with personalized ball garlands and give them a festive look, this material can give your home a huge makeover and set the mood for the upcoming party you are planning to throw!
Souvenir
While your friend is leaving the country to study abroad, you can give him/her a memento that you have made all by yourself!
It can be something as small as a keychain or a book cover made out of felt but trust me, your friend might love and appreciate your gift more than any expensive gifts you could have ever purchased!
Accessory
Felt material is resilient to any kind of wear and tear.
That’s why it’s an excellent fabric to make jewelry and girl’s accessories!
Love those fancy bracelets?
You can make the comfiest bracelets of them all with felt!
Want to be a princess for a day?
Make a felt crown and wear it as a hair accessory whenever you want!
You can also make a coin purse, shoulder bags, earrings, hair clips, necklace etc. with this material.
Miscellaneous
By now you probably have realized that the possibilities with felt projects are endless!
You can make all sorts of things with this fabric including bean bags, hats, flowers, placemats, rugs, slippers, pillow covers, storytelling props or even tents!
The only thing you need to make your dream project come true is your creativity and the right tools to do that job!
Things You Need To Get Started With Felt Projects
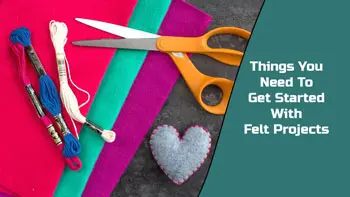
Felt Sheets Of Different Color
Before starting a project, you should determine how many sheets you are going to need and what types of colors you prefer.
Although you can buy each piece individually from a local supermarket, it’s better to purchase a set that contains 40-50 pieces of assorted colors altogether.
Don’t worry! It won’t cost you much and will give you the freedom of working with different colors and the ability to cut, shape, draw and even paint on them as much as you like!
Scissors
Whether you are interested in a no-sew craft or knitted project ideas, scissors are a must-have tool in both cases!
In fact. It’s better to buy 2-3 scissors of different sizes to increase the precision of your work
Make sure to purchase a sharp scissor with titanium coating on top to avoid rust and corrosion in the future.
Glue Gun/ Hot Glue
You are definitely going to need some kind of adhesives if you want to stick up some embellishment on the top of the fabric without stitching them up.
You can purchase a glue gun, tacky glue, hot glue or fabric glue for this purpose. Among these adhesives, tacky glue is the most kid-friendly option.
Embroidery Thread And Needles
When it comes to sewing or knitting wool felt, you are definitely going to need some embroidery threads and needles of different sizes.
Embroidery or cross-stitching threads are cheaper than the traditional thread spools and are available in a large variety of colors. The most common thread is known as Cotton Embroidery Floss, which comes with 458 color options!
Elastic String
Whether you want to create a ruffle pattern on a fabric or make a cushion cover for your pillow, elastic string is needed in both of these cases.
You can use these cords for making beaded bracelets as well! While purchasing these cords, make sure they come with at least 1 mm of thickness.
Buttons And Embellishments
Buttons and crafts go hand in hand!
Something in those cute little colorful buttons make the felt crafts pop in our eyes and make them look adorable!
You can also add some sequins and decorative sewing embellishment to your project and make your craft more interesting and worthwhile!
If you want to use custom button then you should purchase a button maker. It will help you to make various button that you can use in your felt project.
Types Of Felt To Choose From
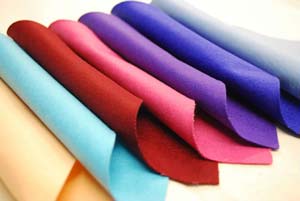
Choosing the right type of felt while crafting will not only save you a lot of time but also, it will make your work easier at the same time!
Let’s have a quick look at some of the common types:
Craft Felt
While shopping for craft sheets online or at any local supermarket, this is the most common type that you will find everywhere.
Made with Acrylic, Rayon, Polyester, Rayon/Viscose blend, this fabric type is best suited for making children’s toys and accessories.
Available in different colors and styles, you will mostly find the craft felt in pre-cut 9x12-inch thin sheets at any craft stores.
Eco-Friendly
Felt is naturally biodegradable.
But if you are looking for something that’s entirely made of wastage material and recycled later, then let me introduce the newest heartthrob in the craft market, which is otherwise known as "Eco-fi".
Eco-fi is made of recycled plastic bottles and also available in glitter, multicolor ad embossed pattern for your convenience.
Pure Wool
Pure wool is a little bit more expensive than the other categories of this craft.
However, this 100% wool material more than makes up for its price tag by giving your handcrafted projects a touch of professional appearance!
This material is used for making a number of different items such as hats, clothes, pillows, footwear, fashion statement and home décor. While shopping for this fabric, you will have the option of choosing different thickness sizes including 1.2, 2, 3 and 5 millimeters.
Blended Wool
Blended wool felt comes with a soft, luxurious texture that’s not found in the regular craft material. Usually, blended wool contains a mixture of pure wool and rayon materials.
You can purchase this fabric by yards or sheets. With 100 different available colors, you are sure to find your favorite one from this collection!
25 Awesome DIY Felt Craft Project Ideas You Can Try Today!
1. Make A Cushion Cover For Your iPad
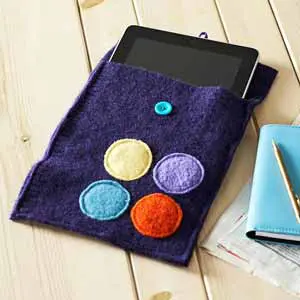
Looking for a way to protect your iPad from all those scratch marks?
Purchasing a cover from the local store isn’t a bad idea until you realize they are all kind of boring and doesn’t really go with your vibrant personality!
Felt covers can be an excellent alternative in this situation.
Not only you get to have your way in terms of choosing the color, fabric etc., but also, this crafting project will help you tap into your creative side as you get to have lots of fun while making this case!
To make this customized iPad case, cut two different sizes of felt according to the measurement of your device.
Sew a button on the smaller piece and attach an elastic to the other section. Stitch the seams together and there you have it!
A brand-new customized iPad cover for your favorite gadget!
2. Let The Flowers Bloom And Make Her Smile
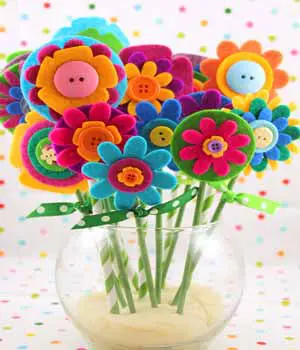
Want to surprise your mom on her birthday?
Give her a flower bouquet that will last forever!
It’s not easy being a mom and for all the hard work that she does, mothers truly deserve some love and appreciation from time to time.
A nice thoughtful way to make her happy is to gift her something you made from scratch like a felt flower bouquet!
The process is quite simple. Cut the fabric into varied sizes and attach a floral wire to the end. You can also use a paper straw as an alternative for this purpose.
To make the flowers look more appealing, attach some colorful buttons in the middle of the flowers using hot glue.
Don’t forget to leave a thoughtful note while you give it to your mom and make her smile even wider!
3. Donut Give up!
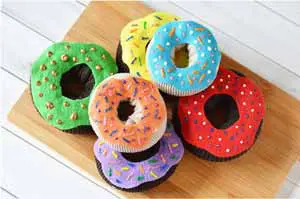
The toughest part of being on a diet is that you can’t have donuts as much as you want! Not fair, right?
Well, a good way to cheer up your mood and give your kids a new toy to play with is by making donut crafts.
All you need for this super simple craft are an old sock that’s probably lying around your bedroom somewhere, fabric paint, hot glue and felts of varied colors.
Cut the toe section of the sock and roll it up as tightly as you can to give it the shape of a donut. Then stick the colorful pieces on top of the donut. Chocolate, Strawberry, Blueberry, Cinnamon or Jelly, you can make any frosting you want with Brown, Pink, Yellow or Green color felt pieces!
Don’t forget to add the fabric paint and make the sprinkles look more realistic!
Click here to read an in-depth discussion about ink and paint before applying it.
4. Butterflies Fly Everywhere
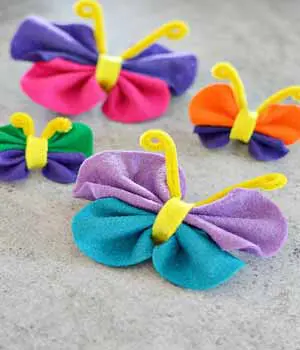
Butterflies are a strong representation of life.
The poor little caterpillar has to go through a lot of changes to finally transform into this beautiful flying insect that everyone loves!
To make a mini-butterfly of your own, you need a cookie cutter or a round lid to trace a circular shape into the felt, a pencil to draw up the rough sketches and a pipe cleaner to make the antennas.
Take two pieces of felt with different colors and draw a round shape on them with a pencil. Then cut accordingly, fold up the pieces in the center and attach them together with hot glue. Wrap a small piece of fabric in the middle to make it look more prominent.
Finally, make two antennas with the pipe cleaner and attach it on top of the butterfly to get the perfect look!
5. Have Some Fun With The letterbox
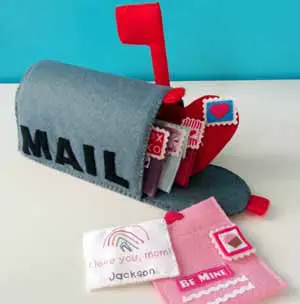
Letters are always romantic. They let you spill your heart out without getting embarrassed!
To make it a little bit more interesting, throw a felt-made letterbox into the picture and see how cool it looks!
To make the letterbox, the thing you will be needing the most is your sewing skill. The rest is pretty easy!
First, cut the fabric into the desired shapes. Then use a mesh sheet to hold the form of the mailbox and stitch the fabric all around it.
You can also add a cute red flag and attach some letters spelling the word “MAIL” to make it look more engaging.
Finally, fill the letterbox with heartfelt notes and let your loved ones know they’ve got some mails to open!
6. Spice Up That Empty Space
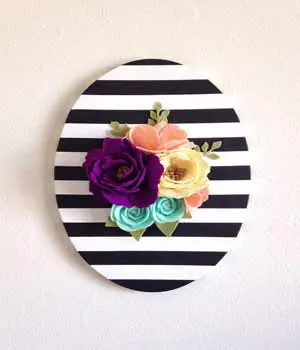
Got a blank space in the middle of the hall that’s looking a bit too much vanilla?
Well, time to spice it up with our next project!
Wall art of any kind looks great if you can do it right. And you don’t need much to get started!
Just pick a pattern that you love and start shaping the pieces accordingly. You can go for a wall-flower art as it usually goes well with all kinds of décor.
Once you are finished cutting the fabrics, use hot glue to assemble all the pieces together. Then, stick the flower on a canvas of your choice and voila! It’s ready to rock your wall!
7. Kids Grow Up Fast
Has your kid started to crawl?
As soon as toddlers master the art of moving, they seem deeply interested in everything you do even you are busy repairing your car!
It makes you wonder how fast your kid is growing up, eh?
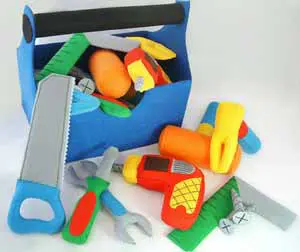
Well, if you want to give him a taste of what you do, yet want him to be safe in his little nest at the same time, then building a felt toolbox is the way to go!
You can make every possible tool you can imagine with this material including screws, hammer, plier, saw, screwdriver and even a toolbox to hold all the items inside once your kid is done playing with it!
And the best part of this project is that your child can shake, grip and play with this toolset safely as they don’t have any sharp edges whatsoever and learn how to be a handyman from a very early age!
8. The Art Of Wrapping
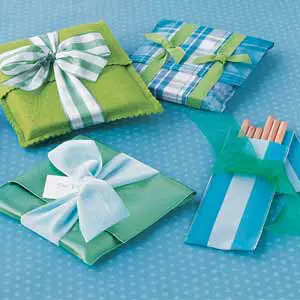
A beautifully wrapped gift influences the receiver to have a more positive attitude towards it.
And the good news is, you only need some bits and pieces of felt scraps to wrap gifts like books, diaries, journals or even some pencils!
To make a felt wrapper, measure the size of the gift that you are going to give and cut two pieces of different sizes from the fabric accordingly.
Then, stitch the two pieces in a way that the bigger section still has some extra fabric hanging off the edge.
Flip the extra material over and use a colorful ribbon to tie it up nicely in the end.
Need I say more?
Your friend is going to love it!
9. “A” For Apple, “F” is For Felt!
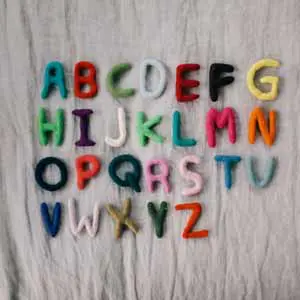
Introducing kids to the alphabets doesn’t have to be so much frustrating anymore!
Making felt-made alphabets are easy and probably the quickest way to teach your children the 26 letters of the English language.
Not only they learn faster in this way, but they also, help create a fun, playful environment for them where they actively participate and have a great time while learning!
You will need embroidery threads, needles and wool felt for this purpose. First, choose a font of your choice and print out the template. Then, cut the letters out and trace them on the felt carefully.
Make sure to cut two pieces for each letter and start stitching around the edges with your embroidery threads and needle.
Leave a small gap before patching everything up and stuff the letters with cotton balls or fiberfill to make them feel plush and fluffy!
10. Make An Everyday Casual Shoulder Bag
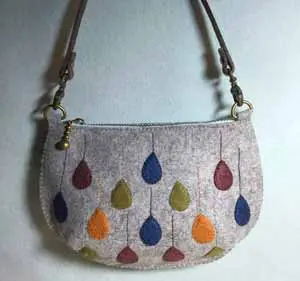
Shoulder bags are our everyday companion.
Instead of purchasing expensive bags from the fancy malls, now you can make a simple one all by yourself with some felt pieces and a leather belt!
A small tip: you should have basic sewing knowledge for this purpose.
To make this shoulder bag, first, cut a suitable piece of your choice and fold it in half.
Then, stitch around the edges carefully and attach a zipper on the front part. To make it look more attractive, you can make some balloon-shaped small patches made out of felt and stitch them on the sides as well.
As a finishing touch, add two hooks on either side of the bag and attach a leather belt around them so that you can easily carry it around.
11. Take One Step At A Time
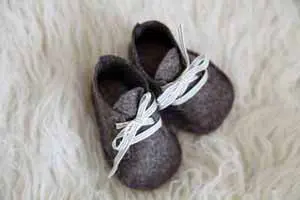
Baby’s first steps are always memorable.
If your kid is out of the crawling stage and now starting to learn how to walk properly, then it's a good time to introduce baby footwear into the picture!
To make baby shoes, first, download a shoe template from the internet. Then, cut the fabric by tracing the template on top of it.
Take two pieces for the sole and the upper part. Then, arrange them together in a way that the sole is lying flat while the upper part is taking the form of a curve and meet at the front.
Then sew the pieces together and punch some holes on the front to make room for some cute little ribbons!
Make another shoe in the same manner and let the pair of beauties adorn the feet of your little angel.
That’s it! Now you can make cute little baby footwear as much as you want!
12. Give Your Diary A New Makeover
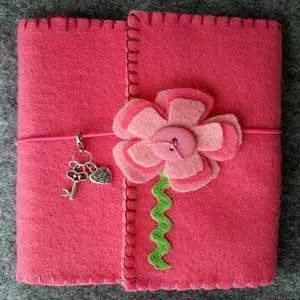
Our next idea on the list is creating an embroidered cover for your journal, which will not only give it a brand-new makeover but also, protect it from getting battered in the future!
To make this diary cover, you will need sewing needle and thread, embroidery floss, wool felt that’s big enough to cover the size of the journal and some scraps for embellishment.
Use the scraps to create a flower design on top of the fabric and stitch it on the surface. You can attach a button in the middle of the flower to make it look more fun!
Then, take two pieces of felt and stitch them in a way that it has a hollow space inside it where the diary can easily fit in. Lastly, add a ribbon around the cover so that it can be tied together to keep it closed.
13. Cozy Coasters For Teacups
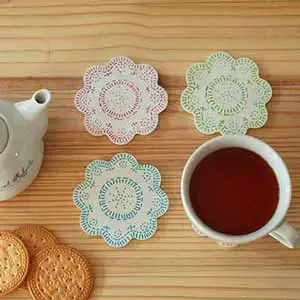
Did you know your favorite hot chai leaves a scratch mark on your expensive table once you put down the teacup?
Hey! That doesn’t mean you can’t treat yourself with hot beverages whenever you want!
Using a coaster under the teacups will help keep the stains off the table as well as catch the eyes of the onlookers if you are clever enough to get a bit creative on this!
To make a cozy coaster, you will need some pre-downloaded templates to get started.
Then, you need to cut two pieces of felt along the lines of the templates and sew them together. Here, we recommend using a synthetic or wool fabric for this purpose. Do not use modal fabric because this type fabric is not suitable for this project.
Once you are done stitching, trim the excess floss away and place it on the table with your teacups on it and say goodbye to any unwanted stains right away!
14. Get Spoiled With Keychain Choices
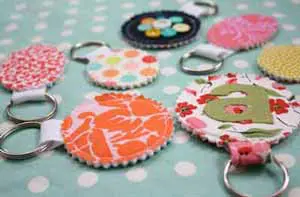
Thinking about what to give your new neighbor as a housewarming gift?
Along with a freshly baked pie, you could also put a DIY homemade keychain in the gift basket!
To make a personalized keychain for your neighbor, pick a piece of felt of your choice. We recommend going for a printed fabric if you want to make it look a bit chic and elegant.
Get a template of the design you want to make and trace it on the felt with a pencil. Cut two pieces from the fabric and start sewing around the edge leaving only a small gap in the middle.
Pack the keychains with as much as poly-fill materials as you can to make it all squishy and stitch the gap closed neatly.
And now you can make as many as you want and gift them to your friends as well!
15. Stay Shady With Sunglasses
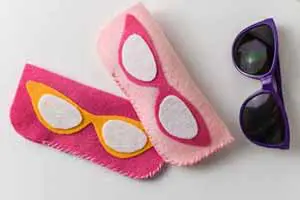
Nothing breaks your heart more than seeing your favorite pair of shades broken after you have taken them out of your bag, right?
To help you out in situations like this, we have found the perfect material to make a cushiony cover for protecting something as delicate as sunglasses!
First, you need to measure the size of your sunglasses and cut twice the amount of fabric from the felt that you chose to work with.
Then, sew the fabric along the edge in a way that the cover has a hollow shape right in the middle for holding the glasses inside.
We suggest using the Double Running Stich, Blanket Stitch and Straight Stitch techniques for this purpose.
Want to make the cover more interesting?
Use a different color of felt scraps to create an eye-catching design on the front or add some embellishment as per your preference.
16. Decorate The Front Door With Wreath
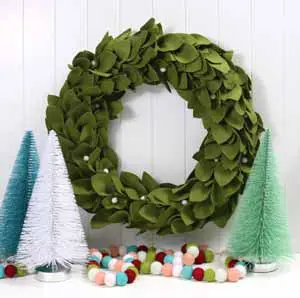
Nothing says “Welcome” more than a gorgeous flower wreath on the front door!
While flowers die after a short amount of time, our next idea on the list is going to live forever because it’s made with felt!
To make an evergreen wreath, you will need a wiring material to form the circular shape of the wreaths and felt fabrics of green color to make all those luscious leaves.
Once the frame is structured, it’s time to cut the shape of different leaves from the green fabric. Then, start layering the leaves on top of each other with hot glue and make them stick to the frame as well.
Still not happy with the final outcome?
Throw in some white felted balls to add a little extra detail and complete the whole magical look that’s going to impress your neighbors for sure!
17. Mark Your Progress
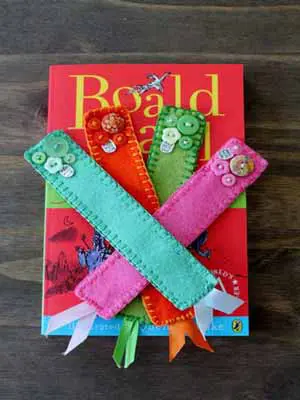
Have you been using post-it notes or a piece of paper to mark the place in the book you have read so far?
Well, it’s time you switch it up with something more creative!
To make a bookmark, first, measure the size of your book and determine the ideal length of your project.
Then, cut two pieces of the fabric and a cardstock according to that size. Pour hot glue on both sides of the cardstock and sandwich it between the two felt pieces and let it dry for a couple of minutes. You can also stitch around the edges if you have some basic sewing skills.
To make the bookmark look a bit more attractive, add some colorful buttons and ribbons on the bottom.
Now all that’s left to do is to find a perfect book, get a hot coffee and start reading!
18. A Birthday To Remember
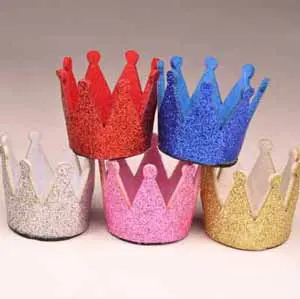
Baby’s first birthday is something a parent cherishes forever!
Want to make this day even more special?
Creating a DIY baby crown will not only look super cute and adorable on that day but also, this project will allow you to bond with your kids even more if you let them help you decorate!
You will need 2 felt craft sheets, scissors, white glue and dazzling glitter for this purpose.
Start by cutting the sheets into a crown shape. Then use the glue to stick both pieces together. You can add some stars or pompoms on the peak of the crown if you want.
Last but not the least, cover the craft sheets with glitters as much as you can (This would be the right time for calling out the little crafter!) and let the crown dry on its own.
19. Multicolor Ball Garland
Holiday seasons are the busiest time of the year.
Especially with a new year coming around the corner, it’s time for bringing your ‘A’ game in terms of putting up the house decoration!
Want to drive away all the winter blues by inviting some cheery colors into your home sweet home?
Consider it done with our multicolor ball garland idea!
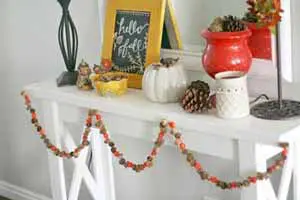
For this project, you will need embroidery floss, a needle and some felt balls of different colors.
It’s a good idea to double up the embroidery floss to build a durable garland. Start arranging the balls in the order way you like and insert them on the string using a needle.
Once you are happy with the length of the garland, space the balls evenly, knot both ends and hang up on the wall for everyone to see your work!
20. Make Some Fun Pencil Toppers
Does your toddler chew at the end of the pencils too?
Admit it! You used to do the same in your childhood!
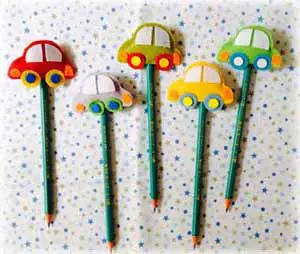
One easy way of getting your child off this bad habit is to make some fun pencil toppers that look cool and hide away any pointy edge of the pencil as well!
Pick some colorful fabrics and cut them to your desired shape. You can attach some small scraps and embellishment on top to make it look more realistic!
Then, stitch around the edges while leaving the center of both ends unknotted. The small gaps on both ends will help you insert the pencil inside easily.
This super cute back-to-school project is also an ideal craft for your kids to get involved!
Just teach them basic sewing skills and watch how quickly they learn to make accessories on their own!
21. A Sleeve For The Coffee Mug
The last time you went to Starbucks, they gave you a free cardboard sleeve, right?
Next time, instead of throwing it away, bring it back with you!
Why?
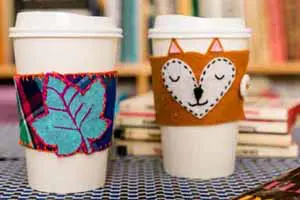
Well, today we will learn how to make a DIY reusable coffee mug sleeve using that cardboard as a template!
Trace the cardboard on a piece of felt and an old flannel shirt. Then cut both pieces out of the fabrics. Decorate the felt part with any embellishment you prefer.
Then, sew both pieces together using a basic blanket technique. To make the sleeve adjustable, attach an elastic band to the felt part and a tiny button on the flannel fabric.
Now all that’s left to do is to wrap the sleeves around your coffee mug and enjoy sipping any hot beverage in it while keeping your hand cool at the same time!
22. A Brand-New Pen Holder
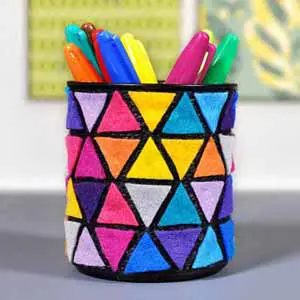
The plain old black colored pen holder on your office desk has been sitting idle for quite a long time, don’t you think?
Well, you can easily bring a pop of color to your workspace by wrapping the entire pen holder with little pieces of felt!
For this purpose, you will need to use jute twine and cover the pen container with it from head to toe. It will act as a base on which the felt pieces can easily be glued on.
Then cut small pieces of felt in triangular shape and use different colors to make it eye-catching. Pour hot glue on the backside of each triangle and hold them onto the pen holder for a few seconds until they get attached properly.
Keep repeating this step until all the triangles get set on the pen holder and enjoy a brand-new colorful container to hold all of your utensils!
23. Showy Colorful Bracelets
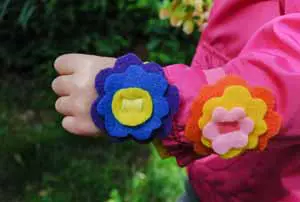
Bracelets are cool, fun accessory that’s loved by young adults as much as little kids!
Interested in making one at home?
Then let's take a look at some of these colorful ones that are super cute and will cost you under 5 dollars in total!
To make a DIY bracelet, you will need felt fabric, Velcro strips, glue and some thread and needle. We recommend using craft felt for this purpose.
Start by taking the measurement of your wrist. Then, cut a bracelet-shaped strip out of the fabric according to the measurement. Add a Velcro tape to each end of the bracelet and see if it fits in your wrist properly.
Once the base is done, you can make different flower-shaped patterns and sew them on top of the bracelet to create different layers.
Don’t forget to take some pictures once you are done and show off your crafty skills on Instagram!
24. DIY Door Decorator
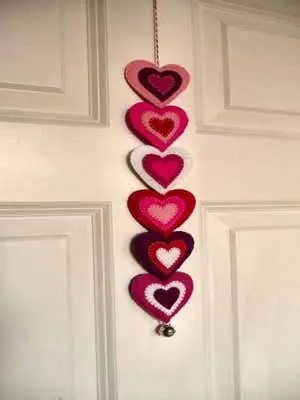
If you live in a rented apartment, then most probably you don’t have the freedom to decorate the interior as much as you want to!
Hey! We can’t argue with your landlord about that!
However, we can share one of the easiest ways to brighten up your space with the help of a DIY door decorator!
To make this accessory, you will need felt fabrics of different colors, scissors, string and some stuffing.
The idea is quite simple. Cut some heart-shaped pieces from the fabric and stitch them up. Before closing the knot, fill the hearts with some fiber-fill to make them a little plump and squishy.
Next, take a floral string and start sticking the hearts up with hot glue.
All done?
Hang the string on the door with the help of a hook and enjoy a whole new look of your bedroom décor!
25. Autumn Pillowcase
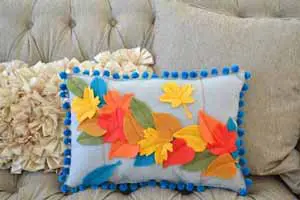
To make this leafy pillowcase, you will need different colors of felt fabrics that go well with the autumn theme including Gold, Orange, Olive, Aqua, Red and Grey.
Take the grey fabric and cut two pieces according to the size of your pillow. Then, sew all three sides of the cover leaving only one side unstitched. You will stuff the pillow inside the cover through that hole.
To make the colorful leaves, download some leaf patterns from the internet and trace them on the felt fabrics. Then, cut out the leaves and lay on the pillowcase in a way that it creates a curved line across the cover.
Then stitch the leaves onto the fabric until you have covered most of the area and add some tassels or pompoms around the edge.
Next, grab your favorite pillow, stuff it inside this awesome pillowcase and get comfortable while reading your favorite novel on a lazy afternoon!
Tips And Tricks For Your Felt Projects
Final Words
There’s a reason why felt is so popular among the crafters all over the world!
This soft and inexpensive material is easy-peasy to work with and literally takes any shape you prefer!
It also breaks the ice for the beginners who are new to the crafting world by giving them the opportunity to work with some of the no-sew projects as well.
Hopefully, our DIY felt crafts ideas and how to do them guideline has inspired you to recreate some of them and have lots of fun along the way!

