How To Heat Press A Hat: Everything You Need To Learn!
Hats are probably one of the most common accessories of our time. They are now variously designed to suit any occasion. Some occasions require plain, sober hats such as the Porkpie or bowler.
Others allow for a little more loudness and creativity; baseball caps are a good example. It may have the print of a team name or number of a certain position; even the name of your favorite player. Branded hats cost considerably more than plain ones.
Why not buy a plain one and brand it yourself? When we look at finished products, their production seems very complicated. Here’s how simple it is to brand your hat.
Hats may be embroidered or printed for decor. But remember the hat is not your everyday flat piece of fabric that you make prints on quite easily. The front of any good quality cap is normally very firm and reasonably curved.
The hat will also most likely have part of it made of plastic and/or metal. This is definitely not something that is going to go into a printer or under a heat press; it requires creativity and/or a special hat press machine.
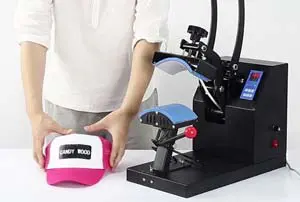
Let’s start with the more conventional; using a hat press machine. This is a special heat press machine designed for hats because of the unique properties that don’t make them suitable for the normal heat press machine.
Table of Contents
How to Heat Press a Hat Using Hat Press?

This refers to using Heat Transfer Vinyl, a special kind of synthetic material that is very good at making prints on fabrics, including hats. The vinyl is transferred onto the fabric by heat application ideally from a heat application appliance.
In the case of hats, this tool is the hat press. The Cap press operates on the same principle as the standard Heat press only. It is customized by a curved heating element which allows for the procedure to take place without damaging the hat.
How Is It Done?
First, you will need the following:
The Process
- 1Make your design. You can make it on any graphic design software. Make sure that you observe the calibrations. The measurements of your design have got to be identical to the print that you will make on the hat.Once you print the design on paper, use it to trace the same onto the heat transfer vinyl.The alternative is to make your design on an electronic cutting machine which allows you to design and cut your pattern. If not, go to step 2.
- 2Lay your design on a cutting board and cut it out and use the weeding tool to remove the cutout vinyl which you do not want appearing on your design. Remember to mirror your image. It is placed on the reverse side on the heat press, so you want your print coming from the right side up.
- 3Make sure your heat settings on the cap press machine are right. Now place your cap on the heat press and secure it using a handle. It is normally on the side of the machine that you can use to stretch the cap so that it fits well on the curved platform.
- 4Place the cut design on to the cap press machine and adjust it to the precise position you want the print.
- 5Press down the heated panel onto the hat and observe the digital display as it counts down the time.
- 6Lift the heating panel after the timer reads 00 and peel off the carrier sheet.
- 7Make sure the print is properly fixed on to the hat.
How to Heat Press a Hat with a Regular Heat Press
Now, the cap press machine is very convenient for heat pressing on a cap because it comes accustomed for the task.
However, just like any other specialized piece of equipment, it comes at a relatively higher cost and may not be affordable to all, whether buying or leasing.
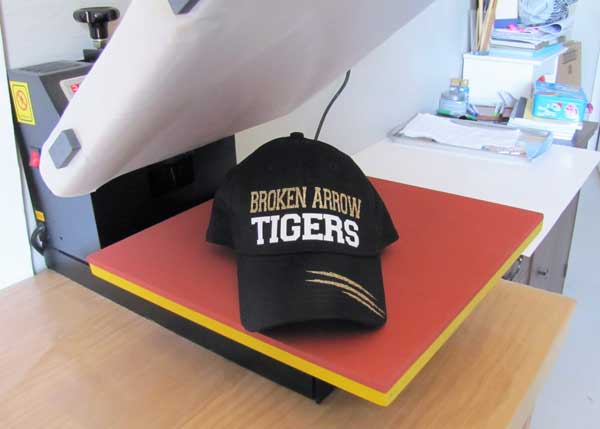
The good news is you can complete the heat transfer technique on caps without the cap press machine. It is actually a very interesting method with the very simple tools and techniques used to give the same result as though one was actually using a genuine cap press machine.
How It’s Done?
You will need the following:
Method
- 1Make your design using a suitable software or trace it out yourself if that is preferred to you.
- 2Cut out the design using a cutting tool on a cutting mat.
- 3Weed out the excess vinyl.
- 4Line the heating panel of the heat press machine with a Teflon sheet. This will prevent the hat from sticking on to the heating element.If not used, the hat could easily stick onto the element and get damaged besides leaving the element with a heavy cleaning job to be done.
- 5Heat up the machine.
- 6Place the design on your hat at the exact position you want it to be and secure it using heat tape.
- 7Place your thick fabric inside the hat and position it so that you can use it to hold your hat in position. The hat will get damaged if placed conventionally on the heat press. You will have to hold and press hard as the heat application takes place.
- 8Place the cap on the heating element lined with Teflon sheet and press the vinyl on a carrier sheet on to the heating element.
- 9Hold it into position and make sure it is heating equally. If not then start with the center of the design and progressively move to the edges.
- 10Once you are confident that the print is firmly secured onto the hat, let it cool down before removing the carrier sheet. If you do not let it cool sufficiently, you might remove the whole print or sections of it.
The Sublimation Technique On Hats
Sublimation refers to a printing technique that transfers ink directly onto your garment and fuses it with the fabric.
It gets its name from the fact that the ink is changed in state from solid to gaseous form and back to solid once it has been printed on the fabric, without going through the liquid state.
Requirements
How To Do It?
- 1Make your design on a computer using any graphics software or on the printer if it has got the provision.
- 2Print out your design.
- 3Heat the cap press machine to recommended settings.
- 4Put the cap on the machine and place the print accurately on the cap. It is very easy with caps to get the placement wrong.
- 5Bring down the heating element and press as you observe the timer. Remove the hat and let it cool before you remove the transfer paper.
This process goes well with both five and six-panel hats. This is because the technique involves transferring of ink rather than putting a layer of print material like in the case of vinyl.
It is generally considered an easier method to use the products that are long-lasting. Heat pressing has become the more popular method used to make prints on caps because it is very convenient.
Compared to say, embroidery which may be mechanized in this time and age but whose procedure and time taken cannot be compared to heat pressing. So, try it out today.
Final Words
Overall, the process of applying vinyl to a hat is relatively easy. You don’t need to worry about the number of panels. Print over the center seam and you’re good to go. Furthermore, you don’t need any special tools. Small accessories are required such as thermal tape, vinyl, etc.
We all know the most popular way of printing a hat which is embroidery. But heat pressing a hat with an HTV is relatively cheap and easy. And, the process is quite fast. It’s also considerably cheap, fast and it’s also very easy to use.
Hope our guide on how to heat press a hat help you to making attractive looking hats at your home. So, start working now and share your final work in comment.

