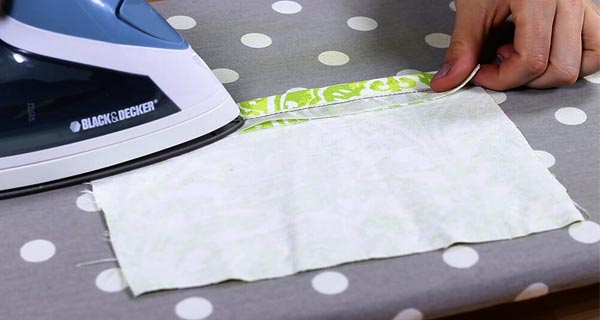
How To Use Hemming Tape : Easiest Guideline for 2023
Whether you're a fabric DIY enthusiast or simply need to make an adjustment to the edge of a piece of clothing, sewing is usually the first idea that comes to mind.
However, it's a process that requires expertise as well experience. However, modern invention has a far easier solution for you. This is known as a hemming tape. In this article, we’ll show you how to use hemming tape products in detail.
Table of Contents
Types Of Hemming Tape
There are basically two types:
1. Iron-On Hemming Tape
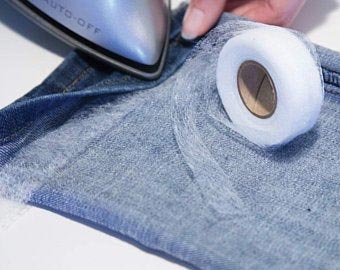
The most popular one is known as an iron-on hemming tape. The tape has adhesive on both sides.
This adhesive or glue is activated through heat, which, upon proper application, smoothly binds together the hem of the fabric. That’s why after applying the tape, you need to put heat on it using an iron.
2. Pressure-Pressed Hemming Tape
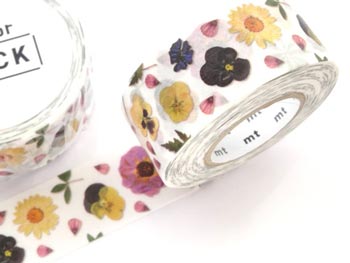
Another type is known as a pressure-pressed hemming tape, such as “Peel n Stick” by iCraft. This is because you simply need to press down on the tape for it to work without the need to apply any heat.
How To Use Iron-On Hemming Tapes?
1. Wash Your Fabric

Washing your fabric is always a good idea but don't opt for a fabric softener for this purpose. The softener's chemical structure reacts poorly to the tape's glue. So, you'll end up getting a weaker bond.
2. Choose A Flat Surface
This will give you smooth operative advantage. It’ll also avoid issues like the tape getting crumpled or twisted in the middle.
3. Unroll The Tape
Now gently unroll the tape. Don’t be too quick or rash. This might get the tape in a twisted texture.
4. Measure In The Right Way
If you're finishing up a fabric product, match the length of the fabric with the tape. However, for shortening purposes make sure you take 1.25-inches more tape in length compared to the fabric you're about to apply it on.
If you're dealing with jeans material, keep in mind the shrinking factor after the initial wash.
5. Apply The Tape
- Mark the hem area.
- Flip the fabric on its inside (the portion that stays unexposed).
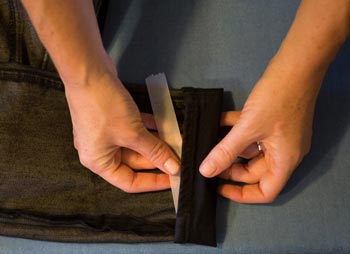
- Now with a medium pace, place the pre-cut and measured tape between the two surfaces.
6. Start Ironing
- If you're covering a short distance, run the iron in a single slide throughout the entire length.
- If it's a longer length, iron in steps (with short breaks in between).
7. Finishing Up
Hemming tapes by themselves do a nice finishing edge. But if you're a sewer, the possibilities are limitless as to how you want to design the edge.
How To Use Pressure-Pressed Hemming Tapes?
Cleaning Up
The fabric’s hem you intend to tape up needs to be cleaned up first. This will clean up the dirt and debris stuck inside the fabric, allowing the tape’s adhesive to sit in properly.
Measure Properly
Use a measuring tape to make sure the length of the fabric matches with the hemming tape. However, if you’re shortening a fabric, the hemming tape should be 1.25-iches longer than the hem.
Apply The Tape
- Mark the working area with a washable chalk.
- Slowly unroll the tape.
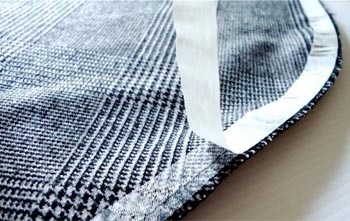
- Then apply it on the indisposed area (also known as the wrong side) of the fabric. This will create a sandwich, the hemming tape staying between the exposed and unexposed portion of the fabric.
- Now start from any one end of the fabric and press on with a medium pace until you reach the finish mark.
- Leave the fabric as it is for the adhesive to set in properly.
Tips On Using Hemming Tape
- If you are dealing with delicate fabrics (silk, customized synthetic, etc.) use a press cloth (preferably cotton) between the iron and the fabric. You can also apply a water towel.
- Hemming tapes, once heated, create a sufficiently strong bond. So practice on leftover fabric scraps. These will give you a necessary practice before the main act and help set the proper temperature for the iron.
- Experiment with the iron’s temperature in between the taping process. This will help you maintain the proper bonding strength of the tape.
- Ensure that the length of the tape doesn’t exceed the length of the hem. Otherwise, you’ll be left with both a wasted tape and clothing.
- When ironing longer lengths, follow the 5/10 rule. Meaning check if the temperature setting of your iron is all right every 5 to 10 minutes.
Conclusion
The reasons behind hemming tapes’ popularity is clear. It's much easier and faster to apply than sewing. The process requires minimal experience and expertise. And last but not least, it can be applied to a wide variety of fabrics.
However, knowing how to use hemming tape accurately is crucial. That’s why, in this guide, we’ve described the process of applying different types of hemming tapes in detail. With this in hand you won’t face any issues using this amazing tool in future.

